The Dirt Work Is Where the Guesses Show Up
A pond gets built twice. Once on paper, and once in the ground.
Excavation is where those two either line up or they do not. Every elevation that was measured wrong, every soil layer nobody tested, and every spring that never made it onto a plan shows up here, with a crew and a fleet of equipment standing on top of it.
That is why “what does it cost to dig a pond” is usually the wrong first question. The dirt work is the largest line item on most pond and lake projects, but what it costs, and whether the pond holds water when you are done, is largely decided before a machine ever rolls onto the property.
This article covers the excavation phase specifically: what actually happens, in roughly what order, and where the money and the risk live.
For the full picture, from lifestyle goals and survey through design, permitting, filling, stocking, and maintenance, start with our main guide: How to Build a Large Pond or Lake. We will point back to it throughout, because most excavation problems are really planning problems.
Disclaimer: Every pond and lake is unique. The topics below are not listed in a strict order, and the sequence changes from site to site. They are a general outline of what professional pond excavation involves, not a step-by-step plan for any one project.
This article is for educational purposes only. It shares our general recommendations and is not engineering, legal, or professional advice for your property. Not every item here applies to every project.
The level of investigation, design, and risk management a project needs can be greater or less depending on the site, the budget, and the outcome the owner wants. Less investigation generally means more unknowns and more risk, including unknown subsurface conditions such as hidden springs, rock, or unsuitable soils. That applies to repairs and renovations of existing ponds and lakes as well as to new construction.
Regulations and permit requirements vary by location. Before starting any project, consult qualified professionals who can evaluate your specific site.
Excavation Is Not Just Digging a Hole
Digging removes dirt. Excavation places it.
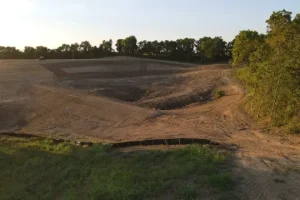
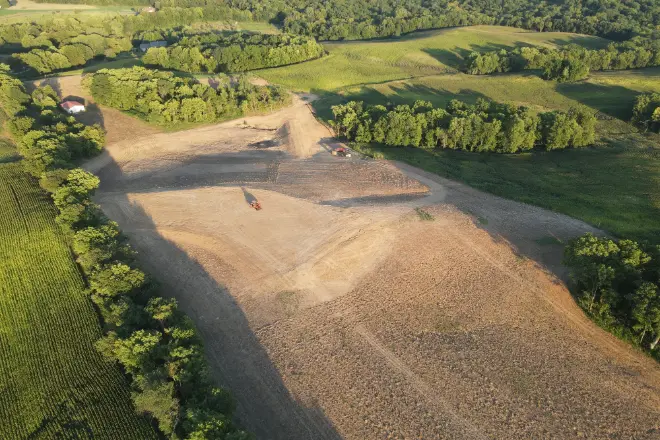
On a pond or lake, nearly everything that comes out of the basin has a job somewhere else on the property: in the dam, in the core trench, under a shelf, shaped into a peninsula, or spread and graded so the site drains the way the design says it should. The material coming out is the material you are building with.
That changes how the work has to be sequenced. A crew thinking only about the hole digs the easy dirt first and figures out where to put it later. A crew building to a design knows before it starts which material goes where, which layers are suitable, and which ones have to be moved out of the way.
In our experience, that distinction matters more than horsepower or hours on site.
The Excavation Is Only as Good as the Plan Behind It
A machine follows a plan. If the plan is wrong, the machine just builds the mistake faster.
We generally approach a project by getting three things settled before excavation begins:
- An accurate survey, so the elevations being dug to are real
- Lab-tested soils at depth, so you know what material you have and where it sits
- A water management plan, so springs, groundwater, and runoff do not shut the job down
Each of those is covered in depth in the main guide. If any one of them was skipped, excavation is where you find out.
Before the First Machine Arrives
The Survey Sets Every Elevation You Will Dig To
Depth, dam height, spillway elevations, shelf grades, and the cut and fill quantities you are paying for all come from the ground elevations.
We run LiDAR surveys in house and design in AutoCAD Civil 3D. Real elevation points, accurate to within inches, are turned into actual earthwork quantities before a single bucket moves.
Photos, free elevation layers, and phone apps are fine for a first look at a property. They generally are not accurate enough to dig from. A few feet of error does not sound like much until it is the difference between a full pond and a mud flat, or between a spillway that works and a dam that overtops.
“We Shot GPS Points” Is Not a Survey
Ask how a site was measured and you will often hear some version of “we took GPS points.”
Do not let that answer stand. Points are not a survey. A scattering of readings across a property does not describe the ground between them, and the ground between them is what you are digging.
A survey is a controlled measurement of the entire site, dense enough to model the terrain, tied to fixed reference on the property, and checked against something independent before anyone designs to it.
So the real question is not what device was in someone’s hand. It is how much of the ground was actually measured, and how the numbers were proven right.
A Survey Can Look Perfect and Still Be Wrong
This is the part most landowners never get told.
Clean contour lines, a professional title block, a color topo map, a smooth 3D fly-through of the property. None of that is evidence of accuracy. It is presentation. A wrong elevation plots just as neatly as a right one.
That is what makes bad survey data dangerous. The errors do not look like errors. They look like a plan. And nobody finds out until there is water in the hole, or there is not enough of it, and by then the dirt work is paid for.
There is one question that cuts through all of it:
How was the survey verified?
Not what equipment. Not what software. Not what acronym. What independent check proved the elevations were right before a machine moved.
A real answer sounds like work: fixed reference points on the property re-measured and compared, the data checked against a second method, the crew verifying grades in the field as the job goes, and the finished pond re-surveyed and compared back against the design at the end. If the answer is a brand name or a shrug, there was no check.
County Maps and Free Elevation Data Are Years Behind
The other common answer is “we pulled it off the county.”
County GIS is a useful tool for what it was built for: parcel lines, ownership, tax records, a general look at a property. It was never built to dig from.
Most of that data is years old. Anything that has changed since it was collected, such as grading, a terrace, a new road, an old pond, or a draw that has washed out, is simply not on it.
And even when the aerial imagery is current, the elevation data behind it usually is not. County contours are broad interpolations stretched across wide areas. They were never intended to be accurate to the tenth of a foot, and nobody at the county is claiming they are. They will tell you which direction water runs. They will not tell you where to set a spillway.
Free national elevation layers have the same limitation for the same reason: coarse, dated, and generalized.
“RTK” Is a Word, Not a Guarantee
RTK has become the buzzword contractors lead with, and it is usually offered the way a trump card gets played: say the acronym, and the customer stops asking questions.
RTK is a correction method. It makes a GPS reading more precise in real time. It is a legitimate tool. What it is not is proof that your survey is accurate.
Precision and accuracy are not the same thing. RTK tied to bad reference, checked against nothing, or used to collect too few points across too much ground will hand you numbers that are very precise and very wrong, and it will hand them to you fast. Then those numbers get drawn into a beautiful map. Precisely wrong is still wrong.
Sometimes there is real survey work behind the acronym. Sometimes the acronym is the entire answer and there is nothing behind it at all. The only way to find out is to keep asking.
If a contractor cannot show you how the dirt numbers were calculated, or how the elevations under them were verified, you are paying for a guess. More on survey accuracy, drone photos versus LiDAR, and what “RTK” does and does not mean is in the main guide.
The Soil Decides Where the Dirt Can Go
Soil testing is not only about whether the pond will hold water. It drives the excavation plan itself.
Lab results and on-site records tell us which material is suitable for the dam and core, which should be set aside, and how deep we can go before conditions change. Without that, the operator is sorting soil by eye in the middle of a dig, and by then the material is already loaded.
Our go-to, and what we recommend, is deep drilled soil borings. We drill them deeper than the planned excavation depth, so we know what sits below the finished bottom of the pond or lake. The lab tests each sample for sand, silt, and clay content. Our team documents gravel, rock, and other materials on site at each depth, since the lab test does not cover those.
We do use excavator test pits, and we prefer them in some hard-to-reach areas. They are convenient, and in the hands of a highly skilled operator a test pit can show the soil layers clearly. They are also very invasive, limited by how far the machine can reach, and with a less experienced operator the layers can get mixed together, which can lead to less accurate lab results.
The full soil discussion, including why a neighbor’s pond tells you nothing about yours, is in the main guide.
The Water Plan Decides Whether You Can Work at All
Water in an open excavation is one of the fastest ways to stall a job.
Water flowing into the hole softens the ground, bogs down equipment, and makes proper compaction impossible. Clay core work stalls. Crews spend days pumping instead of building.
That is why a water management plan needs to be in place before the first machine arrives. It covers how springs and groundwater will be controlled, where water will be pumped and discharged, how the work will be sequenced around wet ground, and how the budget accounts for all of it.
Without that plan, costs on a spring-fed site can double or even triple.
Site Preparation and Stripping
Clearing the Footprint
Trees, brush, stumps, and debris come out of the pond and dam footprint first. Organic material left under a dam breaks down, compresses, and can create leak paths.
This is also the point where what stays has to already be decided. If flooded timber is part of the fisheries plan, which trees stay standing and how deep they end up should be settled during design, not while the dozer is running.
Stripping and Stockpiling Topsoil
Topsoil is stripped off the work area and stockpiled for later use. It is poor structural material and good growing material, which is exactly backwards from what you want under a dam and exactly right for what you want on top of it at the end.
Where those stockpiles sit matters more than it sounds. Put them in the wrong place and you will pay to move the same dirt twice.
The Core Trench Is the Most Important Hole on the Job
The core trench is dug beneath the dam, at or upstream of the centerline, down to suitable material identified by the soil testing. NRCS guidance describes it as a cutoff of relatively impervious material under the dam.
It is backfilled with clay placed in thin layers, brought to the right moisture, and compacted. That compacted core is the dam’s main barrier against seepage.
It is also invisible once the job is finished. Nobody driving past a new lake can tell whether the core trench reached suitable material or stopped a few feet short because it was getting expensive. The water finds out eventually.
Where a site does not have enough suitable clay, the usual answer is to truck it in, and hauling material is often one of the largest costs on a whole project. We developed a vertical core liner method in house for exactly that situation, and it is covered in the main guide.
Synthetic liners work differently. A geosynthetic liner does not require a clay core trench. The liner covers the entire footprint of the pond or lake and is anchored in with a trench around the perimeter, installed professionally.
Why Compaction Is Critical
Compaction of the dam, and especially the clay core, is one of the most critical parts of building a pond or lake. In our experience, poor compaction is one of the biggest reasons dams leak, settle, or fail.
Loose or poorly compacted fill leaves gaps that water can find. Over time, seepage can wash soil out of the dam from the inside and turn a small leak into a serious problem.
Good compaction generally comes down to a few things working together:
- Placing fill in thin layers instead of thick ones. NRCS pond guidance calls for lifts in the range of 6 to 8 inches.
- Bringing the soil to the right moisture before compacting it
- Using compaction equipment that fits the soil type and the size of the dam
- Checking compaction as the dam rises, not just at the end
- Building the dam slightly higher than its final elevation to allow for settlement
Sheepsfoot compactors are a popular and reasonable choice for clay, but they are not the only way to build a well-compacted dam. The right equipment and method depend on the soils, the moisture, and the design.
Before construction starts, talk with a professional about what compaction equipment will be used and how compaction will be handled and checked as the dam goes up. That matters most if you are not working with a true pond and lake specialist, or if you are managing the project yourself.
Moving the Dirt
The Equipment Mix
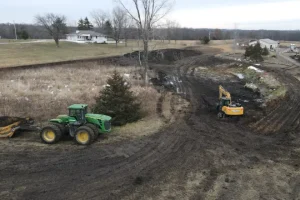
On large ponds and lakes, we use a combination of heavy equipment built for work at this scale, including:
- High-production scraper systems, which cut, haul, and spread material
- Articulated off-road trucks made for large-scale earthmoving
- Excavators
- Heavy-duty modern dozers
Which equipment we use depends on how the bid and design were put together, the layout of the specific property, and the scale of the project. There is no one-size-fits-all setup, and the most productive combination changes from site to site.
Why a Dozer-Only Setup Falls Short
Relying on a dozer-only setup, just because it is a contractor’s go-to or all they have, is an ineffective approach on work at this scale. We have seen it firsthand.
A dozer pushes material. It does not haul it efficiently. Once the push distance grows, production drops and the same yard of dirt gets handled over and over. That shows up as time on site, and time on site is cost.
Equipment age is not the whole story either. Older and newer machines are both prone to breakdowns. What really matters is how the equipment is treated and maintained, and whether it is the right tool for the dirt in front of it. Learn more about how to dig a pond.
Haul Distance Is the Cost Nobody Sees Coming
Earthwork cost comes down to two things: how much dirt has to move, and how far it has to move.
Moving a large amount of dirt a short distance can cost less than moving a smaller amount a long way across a site. That is why two ponds of the same size on two different properties can price out very differently, and why a design that balances the dirt on site is worth what it costs.
When material has to be brought in from off site, hauling is usually the next largest cost after the dirt work. You are paying for trucks, time, and fuel on top of the material itself. Follow the link to see how much it costs to build a pond based on size and other factors.
GPS Takes the Guessing Out
Equipment is only as good as the plan behind it. When a project is not surveyed properly with LiDAR and designed right from the start, operators are often left guessing, and that leads to digging too deep or too shallow. The risk of human error goes up even more with inexperienced operators or without GPS guidance.
We use specialized earthmoving equipment built for pond, lake, and wetland work, including GPS-equipped machines that work directly from the 3D design. Not all of our equipment has GPS, but we have it in house and plan to keep investing in this technology.
Even an experienced operator cannot always be relied on just because they have been doing this for years. GPS takes the bad days and the guesswork out of it. The machine follows the plan to spec, instead of relying solely on human judgment and the errors that come with it. In our experience, that puts grades, depths, slopes, and dam elevations where the design says they should be, and it ultimately saves both the contractor and the owner money.
Shaping the Basin: Depths, Shelves, and Side Slopes
As the basin comes out, it gets shaped, not just deepened. The design generally calls for:
- Deep zones that stabilize temperature and support the fishery
- Shallow shelves for habitat, plants, and wildlife
- Side slopes cut to a grade that holds instead of sloughing
- Access that still works years later, for mowing, maintenance, and equipment
Steep slopes look efficient on day one. They tend to collapse over time, especially in poor soil or where surface runoff hits them. Consistent, designed slopes protect the pond and the ground around it.
Shoreline shape, peninsulas, islands, structure, and water access should all be planned during design rather than added after the fact. Added later, they usually mean reworking something that is already built. Discover more custom pond features for your acreage pond here.
When Excavation Uncovers Something You Did Not Plan For
Even with good testing, excavation can uncover conditions that were not detected. Soil borings only sample specific spots, and conditions can change between them. More testing lowers the chance of a surprise. Fewer tests save money up front but leave more unknowns.
Springs and Groundwater
Springs are a consideration on every project. They are often missed, even by large companies, small companies, and operators with decades in the business. Spotting the signs takes a pond and lake specialist who does this work every day, not once in a while.
Even then, some springs stay hidden until excavation starts. When that happens, they are considered an unknown subsurface condition, and you will have a decision to make: adjust the plan and proceed, or discontinue the pond or lake.
Working through an unplanned spring takes creative problem-solving from someone who has built far more than a handful of ponds and lakes. Experience is what turns a surprise into a solvable problem instead of a costly one.
Rock, Shale, and Unsuitable Soil
The same risk applies to the material itself. Excavation can turn up:
- Bedrock
- Shale
- Sand veins or pockets of other unsuitable soil
- Springs and groundwater
Rock changes the excavation plan and the equipment on site. Sand under the basin can change whether the pond will hold water at all without a liner.
Finding Creative Solutions
When unsuitable soil does turn up, there are often creative ways to work around it. On one project, we found unsuitable soils during excavation and built a peninsula over that area. It kept the project affordable and feasible, and it ended up being one of the most beautiful and unique features of the lake.
Not every project gets that lucky. But the right specialist will know how to approach an unexpected condition and look for practical solutions, instead of simply handing you an unreasonable bid to fix it with no guarantee it will work.
We do not take these situations lightly, and we work closely with our clients when they come up. Still, unknown subsurface conditions are a real risk on any pond, lake, or wetland project, and they should be part of your planning from the start.
Repairs and Renovations Carry This Risk Too
Everything above is written around new construction, but unknown subsurface conditions are not a new-construction problem. They show up on repairs and renovations as well, and on an existing pond or lake the risk is generally higher, not lower.
On a new build, we are investigating ground nobody has touched. Borings, lab results, and survey data describe the site as it is, and the design gets built around what we find.
An existing pond or lake is a different situation. Someone already built it, and we generally do not know every part of how. What the dam core is made of, how well it was compacted, how deep the basin was cut, what was buried during construction, whether a pipe was bedded properly, whether a spring was encountered and worked around: all of that may have happened decades ago with nothing written down.
Diagnostics Lower the Risk. They Do Not Remove It.
There are real diagnostic options for a pond or lake that is leaking or failing, and in our experience they narrow the possibilities considerably. Depending on the situation, that work can include soil borings, a LiDAR survey compared against what is there now, water level monitoring, inspection of the dam and the spillway and pipe structures, and review of whatever history and records exist.
The principle is the same as testing before new construction. The more investigation that gets done, the more likely the cause is identified before repair work starts, and the fewer unknowns are left to turn up mid-project.
What diagnostics cannot do is produce a complete picture of ground nobody can see. They sample and infer. Conditions can change between test locations, and a pond or lake can have more than one problem at the same time.
Diagnostics Are Always Worth It. They Are Not a Cure-All.
We recommend proper diagnostics on any existing pond or lake with a problem. It is the right way to manage risk, and it is how you figure out what the issue most likely is before money goes into a fix. In our experience, the best outcomes come from diagnostics and testing done with a true specialist.
What diagnostics are not is a guaranteed fix for everything. Identifying one issue does not mean another will not present itself later, and that is more true on an existing pond or lake than anywhere else. Diagnostics point at the likely cause. They do not promise that the cause they found is the only one.
The closest thing to certainty is a synthetic liner. In most cases, though not all, an engineered geosynthetic liner is the nearest you can get to a “waterproof” solution, because the finished pond or lake depends far less on what the natural soils turn out to be. It still has to be the right material for the site, properly designed, and professionally installed and seamed, with water and gas management planned around it.
Short of that, a repair works with the ground that is already there. Diagnostics narrow down what that ground is doing, and a specialist can act on what they find, but some of it stays unknown.
Good Records Make Better Diagnostics
The biggest factor in how accurate a diagnosis can be is how much true information exists about the pond or lake.
Things that help:
- Construction records, design drawings, and soil reports from the original build
- As-built surveys and photos from during construction
- Notes on past repairs, and what was done and why
- An accurate account of the pond or lake’s history, including water level behavior over time
The reverse is also true. Where there are no records, or where what is remembered turns out not to match what is actually in the ground, diagnostics have more ground to cover and more room for error.
If you own a pond or lake, keep those records. If you are having one built, ask for them and keep them somewhere they will not get lost.
Either way, on any repair or renovation of an existing pond or lake, unknown conditions can be present. That risk does not go to zero, and it should be understood and planned for before the work starts.
Spillways, Pipes, and Final Grading
The principal spillway pipe and riser are installed through the dam. The emergency spillway is cut to its design elevation. The basin, shelves, and slopes are graded to match the design.
Seepage control along the pipe, such as a filter diaphragm or anti-seep collars, is not always necessary. We recommend it anytime a pipe will be exposed to constant water, since that is where seepage along the pipe becomes a real concern. Where there is not constant water on the pipe, it is often not a necessary investment. It is very case by case, and it should be evaluated carefully by a professional who has looked at the design, the soils, and how the water will sit.
How a pond or lake handles overflow, and how you control its water level, is one of the most important design decisions on the whole project. There are many systems to choose from, and choosing the right one takes an expert. That discussion belongs in the design phase, and it is covered in the main guide.
Closing Out the Excavation
Finishing work is not separate from excavation. It is what protects it.
Stockpiled topsoil is spread back over the dam and disturbed areas. NRCS guidance calls for establishing permanent grass cover on the dam and spillways as soon as possible after construction, and keeping trees off the dam. Rock can be added where waves or flowing water will hit the banks.
Bare ground erodes fast. Even when the work is done right, expect some erosion marks early on while the grass takes root. That part is normal. Without erosion control in a reasonable timeframe, though, those small marks turn into washouts and deep ruts. That sediment ends up in your new pond or lake, and the ruts make the ground around it difficult to mow and manage for years.
We no longer recommend that clients handle the seeding themselves. Redoing failed seeding can cost a tremendous amount, and weather is the biggest risk. We strongly recommend having the contractor, or their landscaping and seeding partners, take care of it. The options and their tradeoffs are covered in the main guide.
Verify the Finished Work
Grades, depths, slopes, and dam elevations should be checked against the design as the work progresses, not just assumed. That matters even more if the contractor is not using GPS-guided equipment, because the work then relies more on the operator’s judgment, and small errors can add up across a large pond or lake.
The most important check comes at the end. A final LiDAR survey of the finished work, compared against the design, is the best way to be sure you got what you paid for: the right depths, the right dam height, the right spillway elevations, and the right volume of water.
If a contractor has no way to show you that comparison, you are taking their word for it.
Where the Excavation Money Actually Goes
Costs on a pond or lake project do not spread out evenly. A few line items carry most of the budget, and on most projects they fall in roughly the same order.
- Earthwork. The largest cost on a project, driven by how much dirt has to move and how far it has to move.
- Hauling materials. When material has to be brought in from off site, hauling is usually the next largest cost after the dirt work.
- Mobilization. Getting equipment to the jobsite and back is a real line item, and one a lot of people do not think about until they see it.
- Overflow systems. Pipes, risers, structures, and the work to install them correctly.
- Seeding and finish work. Where this lands depends on which method is chosen, since there is a wide range between basic seeding and the more involved options.
Design and permitting move around the most. On a project with heavy requirements or serious permitting, they can climb to the top of the list. On a straightforward project, they can sit at the very bottom.
On most projects, though, they are not at the top compared to everything above, and they happen to be the part that protects everything else. Getting the survey, the soils, and the design right up front is what keeps earthwork quantities and hauling needs from turning into surprises in the middle of construction.
Questions to Ask Before Anyone Moves Dirt
- How was the site surveyed, how much of the ground was measured, and how was that survey verified?
- If you are using county or free elevation data, how old is it, and what did you check it against?
- What software was the pond designed in, and can I see the cut and fill quantities and how they were calculated?
- Were soil samples taken at depth and tested by a lab? How deep, compared to the planned bottom of the pond?
- What equipment will be on site, and why that mix for this property?
- Will the machines run GPS off the 3D design?
- What equipment will you use to compact the dam and core, and how will compaction be checked as it rises?
- Where will the excavated material go, and how far does it have to move?
- Are there springs or groundwater on the site? What is the plan and budget for them, and what happens if one is found during construction?
- How will you handle unknown subsurface conditions, like rock or unsuitable soil, if they turn up?
- Will the finished work be checked with a final LiDAR survey against the design?
- If this is a repair or renovation, what diagnostics will be run, and what will they tell us and not tell us?
If the answers are vague, the design probably is too. Read more about the importance of professional pond excavation.
Excavation Is One Chapter of a Bigger Process
Everything above happens inside a much larger process. Survey, soils, historical and watershed research, design, permitting, filling, stocking, and long-term maintenance all sit around the dirt work, and most excavation problems trace back to one of them.
If you are planning a pond or lake, start there. How to Build a Large Pond or Lake (And Why You Should Leave It to the Pros) is our main guide, and this article is the excavation chapter of it.
These are some of the biggest topics, but they are far from all of them. This work is quite literally science: soils, water, earthwork, and biology all working together. That is why every project is unique, and why the right approach for your property may look different from anything described here.
Helpful Resources
- NRCS Agriculture Handbook 590: Ponds, Planning, Design, Construction
- NRCS Conservation Practice Standard: Pond (Code 378)
- NRCS Web Soil Survey
- EPA: Developing a Stormwater Pollution Prevention Plan (SWPPP)
- U.S. Army Corps of Engineers
- U.S. Army Corps of Engineers National Inventory of Dams
Build It Right With Bulletproof Pond and Lake
All we do is ponds, lakes, and wetlands.
Our general approach starts with a LiDAR survey, lab-tested soils, historical and watershed research, and a full design in AutoCAD Civil 3D, so the excavation is building to a plan instead of working one out as it goes.
That is how we build ponds and lakes that hold water, hold up, and stay in the family for generations.
If you are considering an acreage pond installation and want expert eyes on your land, fill out our contact form today, or give us a call.
The information in this article is general and educational. Every site is different, and results depend on site conditions, design, construction, and maintenance. Bulletproof Pond and Lake makes no guarantee that this information applies to or will produce a specific result on any particular property.