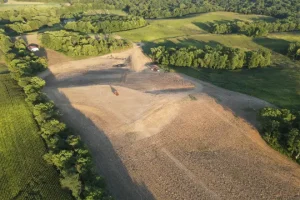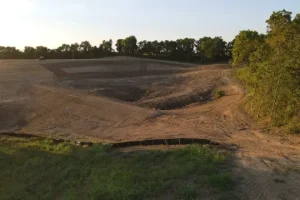
Your Dream Lake or Pond Starts Here
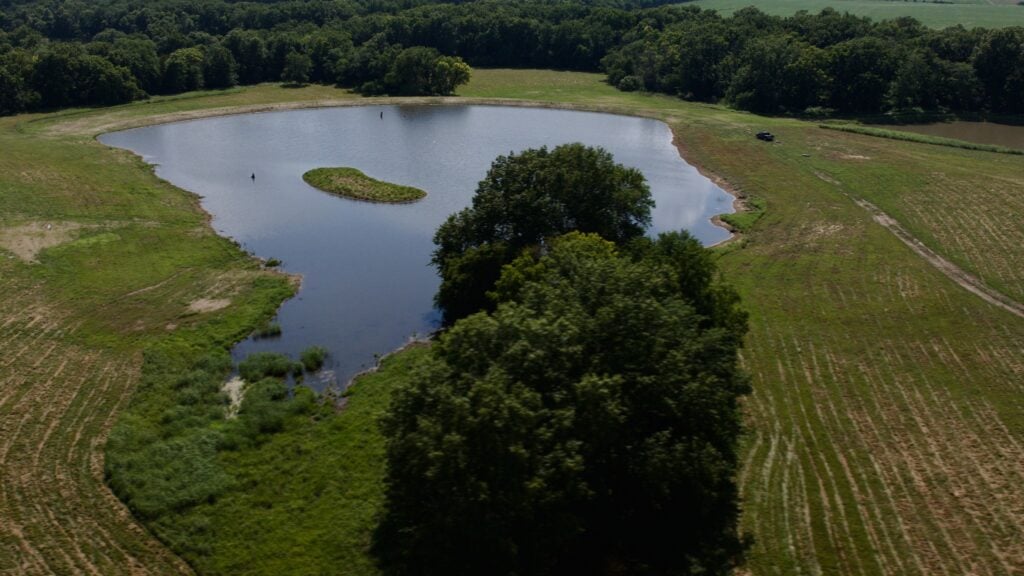
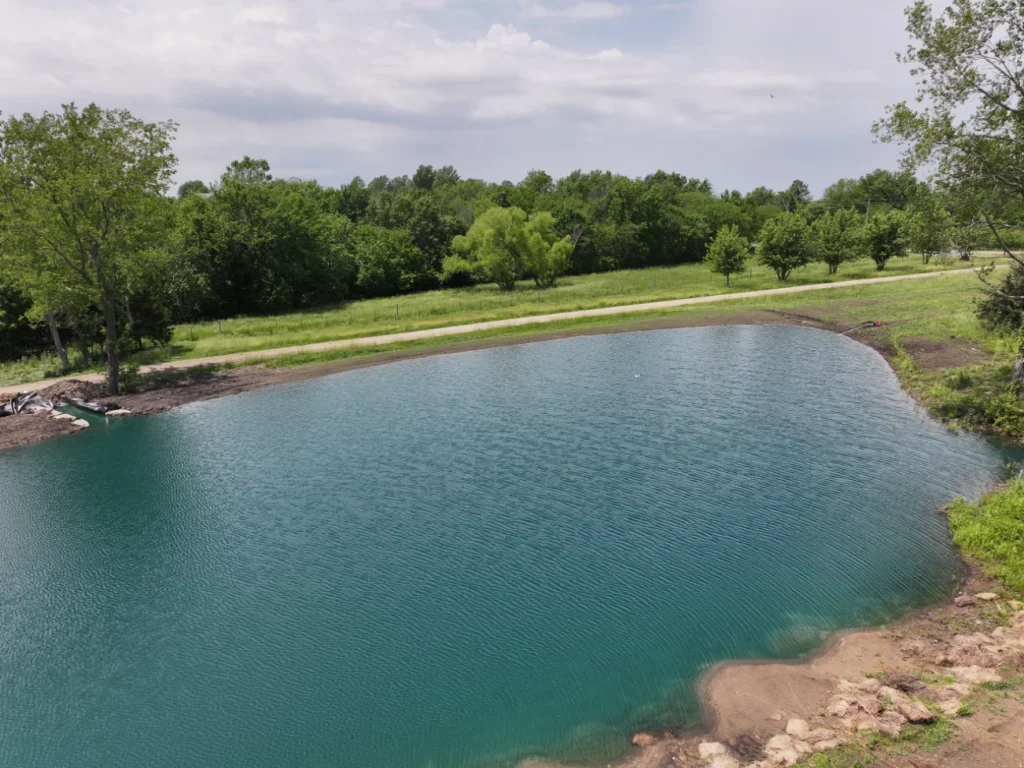
Picture a private lake out your back door. Early mornings chasing trophy bass. Duck season from your own blind. Kayaks on the water all summer, and a waterfront view your grandkids will still be enjoying decades from now.
A large pond or lake is one of the best investments you can make in your land. It’s also one of the easiest to get wrong. Knowing how to build a large pond or lake that actually holds water starts long before a machine shows up.
Waterfront ponds and lakes are built for many different purposes. These aren’t the only uses, but they are some of the most popular:
- Fishing ponds and lakes: from family fishing to serious bass and trophy fish management
- Hunting and wildlife ponds: waterfowl hunting, deer, and wildlife habitat
- Irrigation, farm, and ranch ponds: water for crops, gardens, livestock, and cattle
- Recreational lakes: swimming, kayaking, paddleboarding, and boating
- Waterfront homesites and estate lakes: a scenic centerpiece for the home and property
- Multipurpose ponds and lakes: combining two or more of these uses, which takes careful planning
Each purpose calls for a different design, and the right one starts with knowing how you want to use the water.
Most failed ponds weren’t built on facts. They were built on guesses: guessed elevations, guessed soils, and guessed water.
This guide walks through how large ponds and lakes are actually planned, designed, and built, based on how we generally approach an acreage pond installation at Bulletproof Pond and Lake.
You’ll learn what happens at each step, why it matters, and what to ask so you don’t end up paying for a guess.
Disclaimer: Every pond and lake is unique. The topics below are not listed in a specific order. They are a general outline of what professional planning, design, and construction involve, not a step-by-step plan for any one project.
This article is for educational purposes only. It shares our general recommendations and is not engineering, legal, or professional advice for your property. Not every item here is required on every project.
The level of investigation, design, and risk management a project needs can be greater or less depending on the site, the budget, and the outcome the owner wants. Less investigation generally means more unknowns and more risk, including unknown subsurface conditions such as hidden springs, rock, or unsuitable soils.
Regulations and permit requirements vary by location. Before starting any project, consult qualified professionals who can evaluate your specific site.
Start With the Lifestyle You Want
Before any survey or dirt work, the first question is simple: how do you want to use the water?
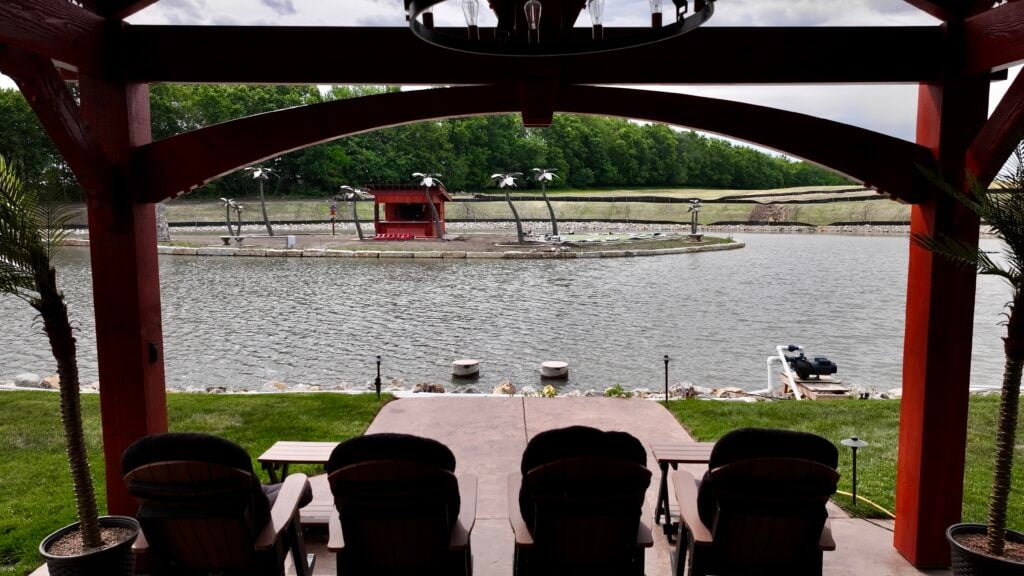
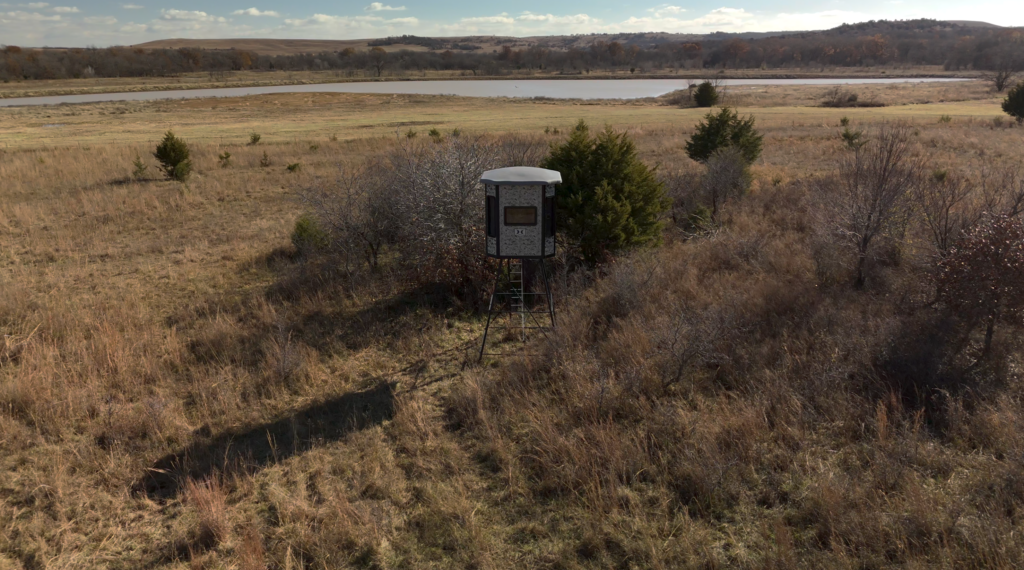
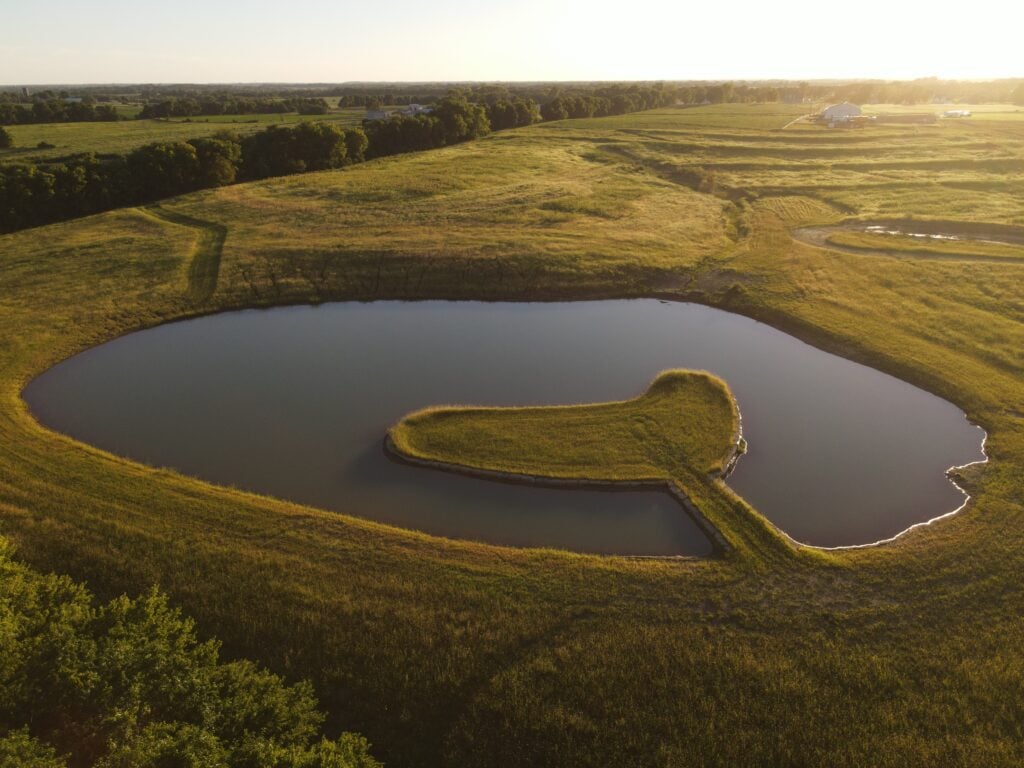
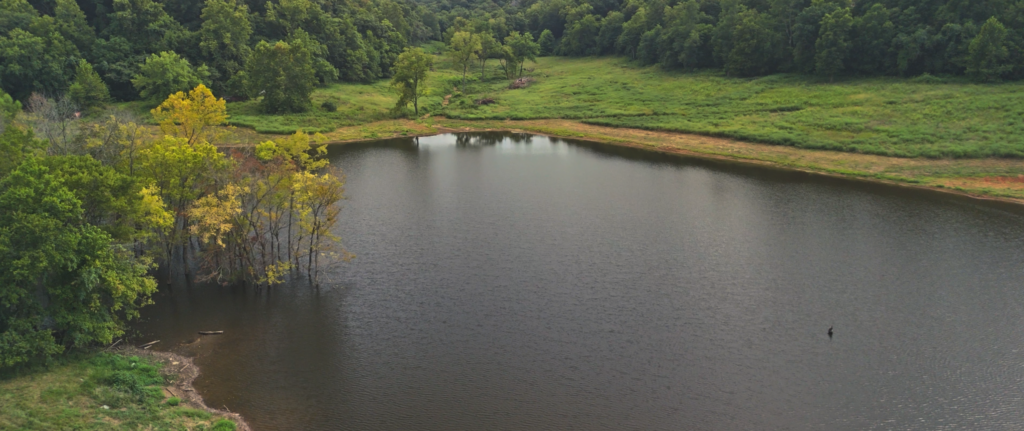
A lake built for trophy bass looks different from a pond built for duck hunting. A waterfront homesite has different priorities than a livestock pond. Knowing the goal up front shapes the depth, the shoreline, the dam, and the budget.
Combination uses are even trickier to plan for. A pond or lake that has to handle more than one job, like irrigation plus swimming and recreation, especially needs professional planning.
Elevations, soil types and materials, location, and more all affect how well those uses work together. Irrigation pulls the water level down, and if the design doesn’t account for that, the result can be the difference between an irrigation pond that’s also beautiful for swimming and recreation, and a mud pit that ends up only being usable for irrigation after all.
Start With an Accurate Survey
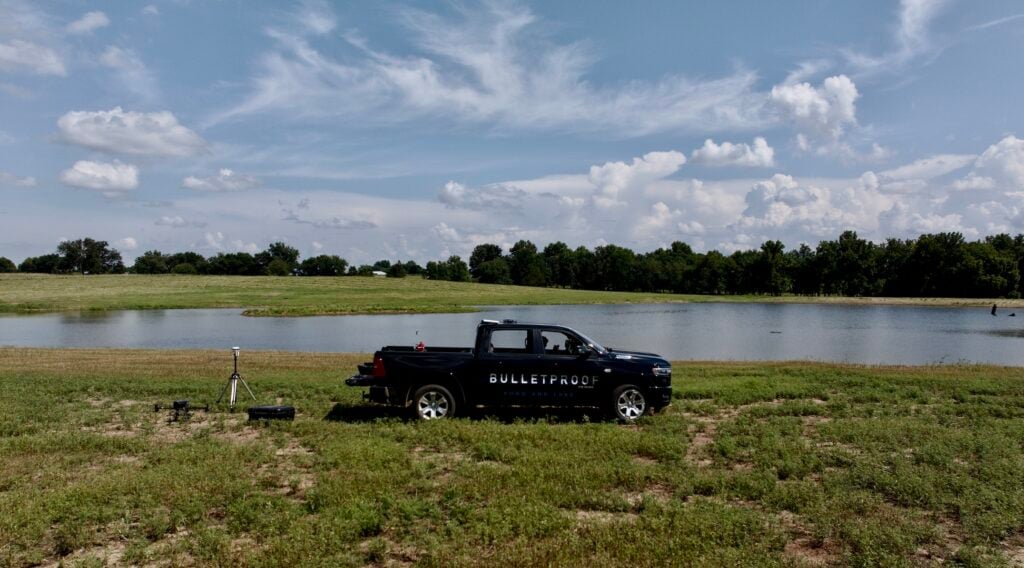
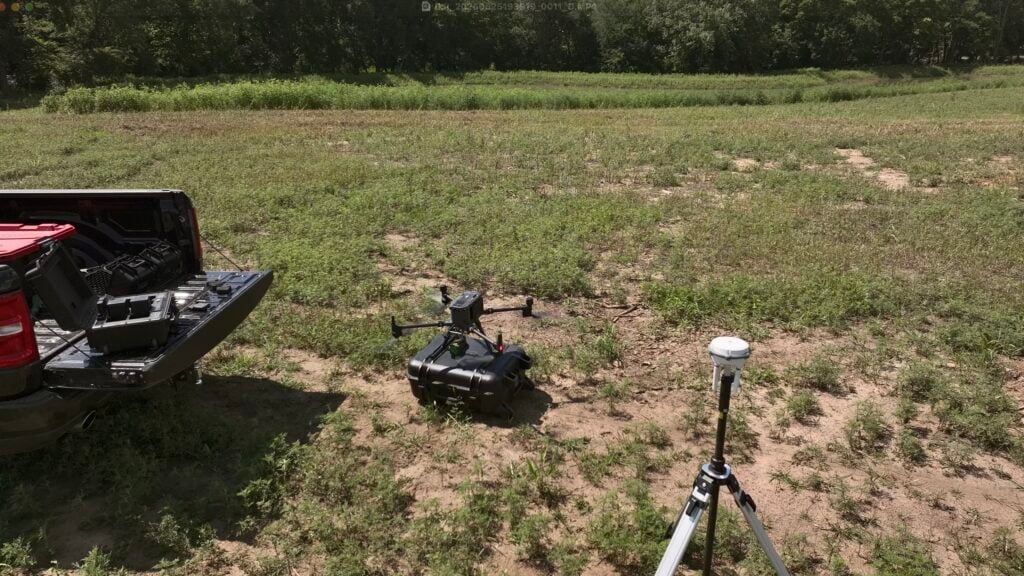
Every pond design starts with the ground. If the elevations are wrong, everything built on them is wrong: the depth, the dam height, the spillways, the water level, and the dirt quantities you’re paying for.
Why Google Earth and a Phone App Aren’t a Survey
Google Earth, free elevation layers, and phone apps are fine for a first look at a property. They aren’t built for designing a pond.
Their elevation data is coarse and often years old. A few feet of error doesn’t sound like much until it’s the difference between a full pond and a mud flat, or between a spillway that works and a dam that overtops.
Google Earth does have a place. It’s useful for initial 2D planning: looking at the layout of the land, sketching a rough footprint, and showing a landowner the concept.
But the real planning happens in 3D. That’s where the design is finalized, the dirt is balanced, and the water levels are set. On larger ponds and lakes, getting that 3D design right can easily save six figures or more.
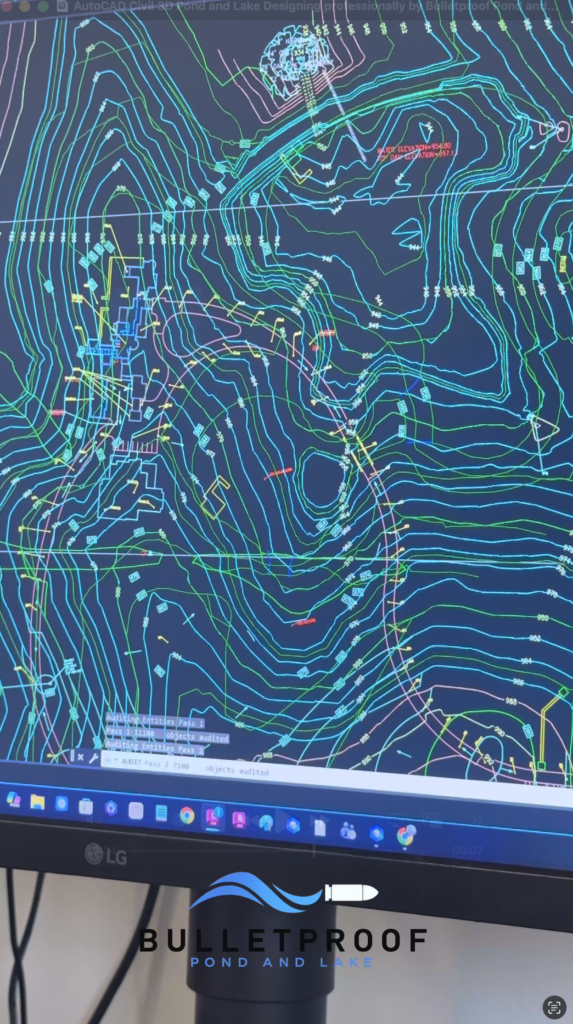
We use Google Earth only for early 2D planning and concept depictions, then move into AutoCAD Civil 3D. For new construction, we always recommend a full 3D design.
Drone Photos vs. LiDAR
A drone with a camera can create maps of a property, and those maps are useful for seeing layout and features. But a camera can only map what it can see. Over tall grass, brush, or trees, it captures the top of the vegetation, not the ground underneath it.
Be careful with anyone advertising that they “create 3D models” of your property. Without LiDAR and real civil design software behind it, that’s a marketing buzzword, not a technically accurate claim, and it isn’t something you can design a pond or lake from.
LiDAR works differently. It sends out laser pulses, and many of them pass through gaps in the vegetation to reach the ground. That lets us build a true bare-earth surface, even on overgrown land where photo-based mapping falls apart.
We fly professional-grade, survey-level drone LiDAR equipment, and when there’s existing water on the site, we offer bathymetry (underwater mapping) as needed or requested.
What “RTK” Does and Doesn’t Mean
You’ll hear “RTK” a lot. It stands for real-time kinematic, a GPS correction method that tightens up where a drone or GPS unit thinks it is.
Our drone uses it too. But RTK on its own isn’t a survey, and it isn’t a design. It doesn’t show what’s under the grass. It doesn’t catch a data setup mistake. And it doesn’t turn a set of photos into an engineered pond. It just tells the drone where it’s at in the air.
Too often, that term gets used to make a service sound more advanced than it is, and landowners end up paying for something misleading.
When “RTK” is the main selling point in a pitch, treat it as marketing language, not proof of accuracy. Ask how the data was collected, and what software the pond was designed in.
Don’t get ripped off by someone who says they “use RTK, drones, and Google Earth.” Past a few buzzwords, that tells you nothing about accuracy. It’s just marketing language.
Drone photos and an app can make a pretty map, but they can’t tell you cut, fill, or cost with any real accuracy. We can, because we measure it instead of eyeballing it.
We run in-house LiDAR surveys, build the design in AutoCAD Civil 3D, and work alongside licensed engineers and partners when a project calls for it. Real elevation points, accurate to within inches, are turned into actual earthwork quantities before a single bucket moves.
The Details That Separate Good Data From Bad
Accurate elevations depend on technical details most landowners never see. Behind every reliable survey is a careful, consistent setup, from how the data is collected to how it’s brought into the design.
When those details are handled wrong, elevations can be off by far more than a few inches, sometimes by many feet. That’s not a rounding error. That’s a design built on the wrong ground.
Test the Soil the Right Way
The soil decides whether your pond holds water. It’s also the part of the project people guess at most often.
What the Neighbors’ Pond Doesn’t Tell You
One of the most common misconceptions we run into is the belief that the soil must be fine because of what’s around it. The previous owner said the ground holds water. A neighbor has a pond down the road that’s been full for thirty years. Somebody says this whole area has good clay.
That is the single most unreliable way to plan a pond or lake. Soil can change dramatically across one property, sometimes within a few hundred feet, and it changes with depth as well. The pond down the road was built in different material, at a different depth, in a different position on the landscape, and quite possibly by someone who tested first.
Area reputation, a neighbor’s pond, and what a previous owner remembers are not data. None of it tells you what’s under the specific ground where your pond or lake is going, and it’s an expensive assumption to make, because you usually don’t find out it was wrong until the hole is dug and the water won’t stay in it.
Why an Excavator, Shovel, or Hand Auger Isn’t Enough
A shovel or hand auger only tells you about the top few feet of soil. Hand tools stop at the first hard layer, and squeezing a handful of dirt can’t tell you how much clay is actually in it.
The old field tricks aren’t a substitute either. Putting a wad of clay in your mouth, rolling it, or throwing it to see how it holds together, and bucket or jar tests done at home, are not methods we recommend. They can’t tell you how much clay is actually in the soil, at what depth, or whether it will hold water once it’s moved and compacted.
Soils change with depth. A good clay layer can sit right on top of sand, gravel, or fractured rock.
An excavator can dig much deeper, and test pits are an extremely convenient way to look at the soil. In the hands of a highly skilled operator, a test pit can show the soil layers clearly. With a less experienced operator, layers can get mixed together, which makes it harder to tell what soil is at which depth and can lead to less accurate lab results.
Excavator test pits have other limits too. They’re very invasive and disturb much more ground than a boring. Their depth is limited by how far the machine can reach, and digging deeper safely takes more work and costs more. Groundwater can also cave a pit before you learn what you need.
We do use excavators for soil testing, and we prefer them in some hard-to-reach areas. Otherwise, our go-to, and what we recommend, is deep drilled soil borings. Borings reach deeper, show what soil is at each depth, and are far less invasive to your property.
When a site calls for it, a combination of methods can work, but soil borings should be the primary method.
Every property is different and carries its own risk. How many tests make sense depends on the site and on how much you want to invest in risk management planning.
Drilled Samples and Lab Testing
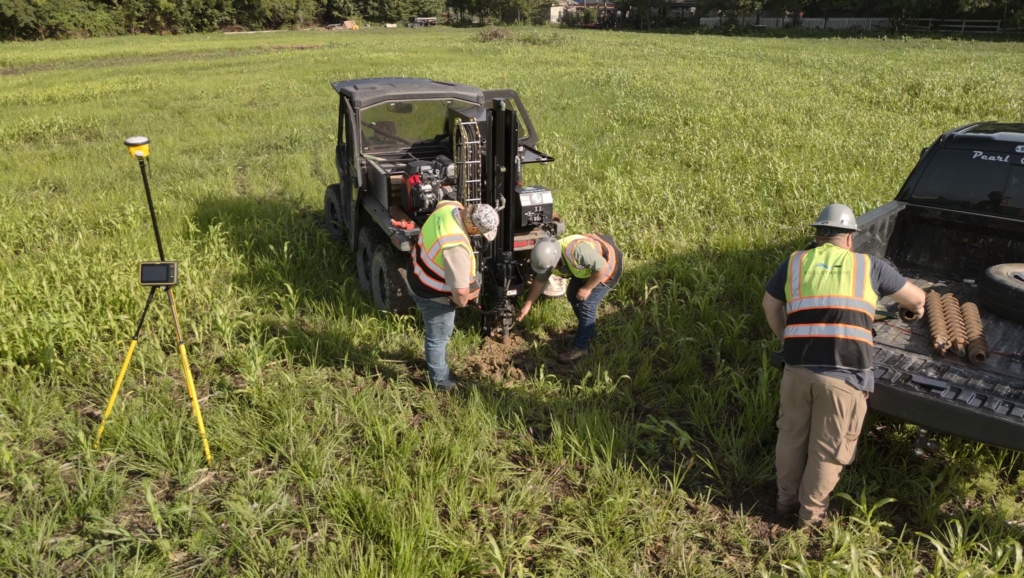
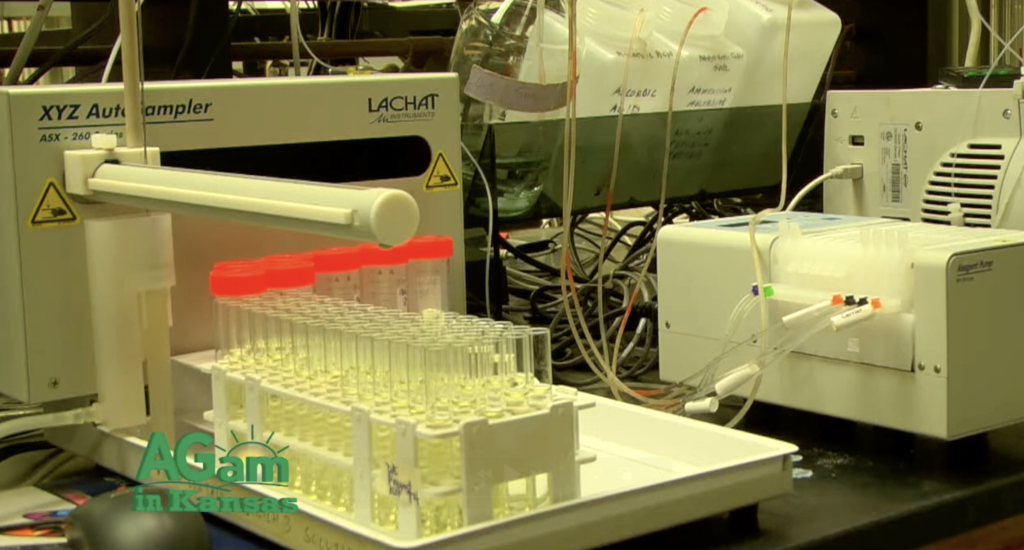
We use a dedicated drill rig to pull soil samples at depth across the site, then send them to a soil lab. The lab tests each sample for its sand, silt, and clay content, which shows how much clay is really there.
Source: parts of this section draw on That’s My Farm: A Tour of the K-State Soil Testing Lab (Farming Unlimited TV, with Kansas State University Research and Extension), which walks through how a soil lab actually processes and reports samples.
Our team also documents what we find on site at each depth, including gravel, rock, and other materials the lab test doesn’t cover. Together, the lab results and our on-site records give a clear picture of the soil profile.
That tells us which soils are present, at what depths, and in what amounts. It shows whether the site can hold water on its own, where the dam core material will come from, and whether the design needs a clay liner or a synthetic liner.
That approach lines up with the USDA Natural Resources Conservation Service (NRCS) pond planning, design, and construction handbook, which calls for borings across the pond and dam site, with more of them where soils vary. We drill our borings deeper than the planned excavation depth, so we know what sits below the finished bottom of the pond or lake.
NRCS guidance also notes that sites with enough fine-grained soil and plasticity, in a thick enough undisturbed layer, can often hold water without a liner. Its pond standard calls for identifying problem soils, such as dispersive, collapsible, or expansive clays, before a dam is designed.
It’s also risk management. Finding sand at 8 feet on a lab report costs far less than finding it after the basin is dug.
For a first look at your property, the NRCS Web Soil Survey is a helpful starting point. It maps general soil types, but it doesn’t replace testing on your site.
Keep in mind how that data was built. The National Cooperative Soil Survey dates back to 1899, and NRCS says its soil survey data (SSURGO) was collected over the course of a century, largely by walking the land and observing the soil. It was mapped at broad scales, from about 1 inch = 1,000 feet to 1 inch = 1 mile, and published as printed county soil surveys from 1899 until 2005, when Web Soil Survey became the official source. Depending on the county, much of that mapping was done decades ago.
NRCS does refresh the data every year through its Annual Soils Refresh on October 1, but it isn’t a full remap. According to NRCS, most areas see only minor updates in a given year, and roughly 10 to 20 percent of survey areas receive more significant changes.
Because the maps show general soil areas, not exactly what’s under a specific pond or dam site, we suggest using the Web Soil Survey as a reference only and not relying on it alone. To see how current the data is for your property, check the survey area version and date listed in your Web Soil Survey soil map report.
Not Sure What’s Under Your Ground?
Soil is the one thing you can’t guess your way through, and testing is the cheapest part of the whole project. If you’re planning a pond or lake and want to know what your site is actually working with, contact us and we’ll walk you through what your project needs.
Research the Site’s History and Water
A pond lives or dies by its water. Before we design anything, we study where the water comes from, where it goes, and what the site has been through.
Historical Research
We dig into the history of the property and the surrounding area, including:
- Historical aerial imagery showing past ponds, fill, drainage changes, and land use
- Rainfall records, flood history, and drought cycles
- Weather and climate patterns, including seasonal wet and dry periods, freeze-thaw cycles, and evaporation
- Existing soil and geologic maps
How deep this research goes depends on the project. A small farm or ranch pond needs less than a multi-acre lake with a tall dam. But every project needs some.
Watershed Calculations
The watershed is all the land that drains into the pond. Its size, slope, soils, and ground cover determine how much water the pond can expect.
Too little watershed and the pond may never fill or stay full. Too much and the dam and spillways have to handle heavy flows during big storms.
We calculate the drainage area and runoff from the survey data so the pond depth, dam, and spillways are sized for the water that will actually reach them.
Don’t take this step lightly. Watershed and runoff calculations are only as accurate as the survey and design behind them.
The drainage area, slopes, and flow paths all come from the ground elevations. A watershed often stretches well beyond the property, sometimes across thousands of surrounding acres. We don’t have permission to survey land we don’t own or aren’t hired to work on, and surveying that much ground ourselves usually isn’t feasible. For the larger drainage area, we rely on official mapping and elevation sources.
The area around the pond or lake itself is a different story. That ground is critically important, and it’s where our own LiDAR survey and civil design software make the biggest difference. Less accurate sources, like drone photos or general online maps, can throw the runoff estimate badly off right where it matters most.
Relying only on official sources, or only on a site survey, isn’t recommended. The best results come from combining the two, and it takes a skilled specialist to weigh them properly. Done right, it dramatically improves your chances of accurate watershed calculations, and that can make or break how well the pond or lake fills and how well the dam and spillways handle big storms.
NRCS publishes regional guidance on minimum drainage area and minimum pond depth. Its handbook recommends deeper ponds in drier regions to make up for seepage and evaporation, and siting the dam where the most water can be stored with the least amount of fill.
Getting the watershed and water sources right can be the difference between a pond or lake that stays full year-round and one that dries up by the end of summer, or never fills past a certain level.
Sometimes a lower or seasonal water level is intentional, like a wetland designed to be drawn down and flooded. Other times it’s an accident. Which one you end up with depends on intent, design, research, and risk mitigation.
Springs, Groundwater, and Other Water Sources
We also look for every water source on the property: creeks, drainage ways, seeps, groundwater, and springs.
A spring can be a great asset. It can help keep a pond full through dry summers.
Wells and pump systems are worth considering too. Pumping from a well, a nearby water source, or another supply is a common way to fill a pond or lake and top it off during dry stretches. Wells are especially popular on recreational ponds and lakes.
Keep in mind that well water often comes out with little oxygen in it. If the pond or lake is meant to support fish and habitat, we recommend adding an aerator to go with it.
But a spring that isn’t found and planned for can turn a project upside down. Water flowing into an open excavation softens the ground, bogs down equipment, and makes proper compaction impossible. Clay core work stalls. Crews spend days pumping instead of building.
That’s why a water management plan needs to be in place before the first machine arrives. It covers how springs and groundwater will be controlled, where water will be pumped and discharged, how the work will be sequenced, and how the budget accounts for all of it.
Without that plan, costs on a spring-fed site can double or even triple.
Springs are a consideration on every project. They are often missed, even by large companies, small companies, and operators with decades in the business. Spotting the signs takes a pond and lake specialist who does this work every day, not once in a while.
Even then, some springs stay hidden until excavation starts. When that happens, they’re considered an unknown subsurface condition. That’s why it pays to plan for them either way:
- Invest in more soil sampling to improve the chances of finding groundwater and springs before construction.
- Put a water management plan in place for construction, and for long-term maintenance when it’s needed.
- Plan ahead on liner projects. An active spring under a liner can build up water beneath it, so the design may need a drainage or recirculating system.
- Understand the risk. If a spring is discovered during construction, you’ll have a decision to make: adjust the plan and proceed, or discontinue the pond or lake.
Working through an unplanned spring takes creative problem-solving from someone who has built far more than a handful of ponds and lakes. Experience is what turns a surprise into a solvable problem instead of a costly one.
Unknown Subsurface Conditions
Hidden springs are one example of what’s known as an unknown subsurface condition: something below the ground that wasn’t found before construction started. The same risk applies to the soil itself.
Even with good testing, excavation can uncover conditions that weren’t detected, such as:
- Bedrock
- Shale
- Sand veins or pockets of other unsuitable soil
- Springs and groundwater
Soil borings only sample specific spots, and conditions can change between them. More testing lowers the chance of a surprise, so we recommend adding tests based on how much you want to invest in risk management. Fewer tests save money up front but leave more unknowns.
Finding Creative Solutions
When unsuitable soil does turn up, there are often creative ways to work around it. On one project, we found unsuitable soils during excavation and built a peninsula over that area. It kept the project affordable and feasible, and it ended up being one of the most beautiful and unique features of the lake.
Not every project gets that lucky. But the right specialist will know how to approach an unexpected condition and look for practical solutions, instead of simply handing you an unreasonable bid to fix it with no guarantee it will work.
We don’t take these situations lightly, and we work closely with our clients when they come up. Still, unknown subsurface conditions are a real risk on any pond, lake, or wetland project, and they should be part of your planning from the start.
Design the Pond or Lake in Civil Engineering Software
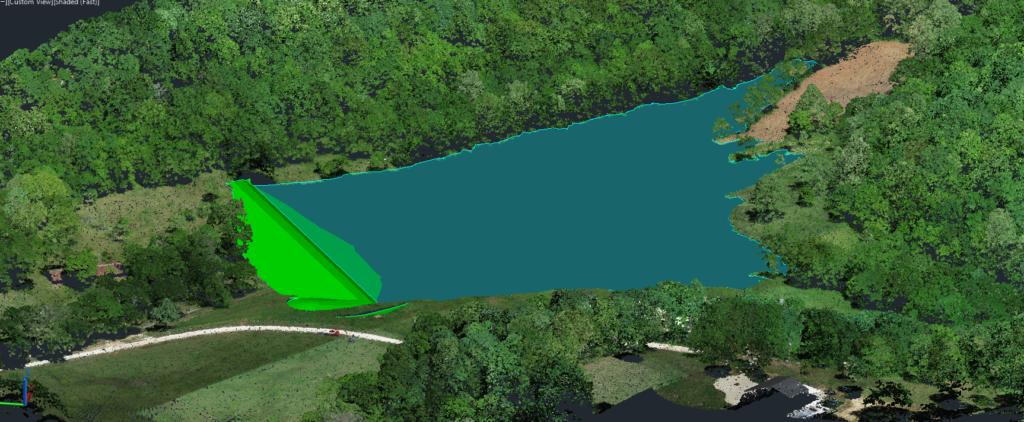
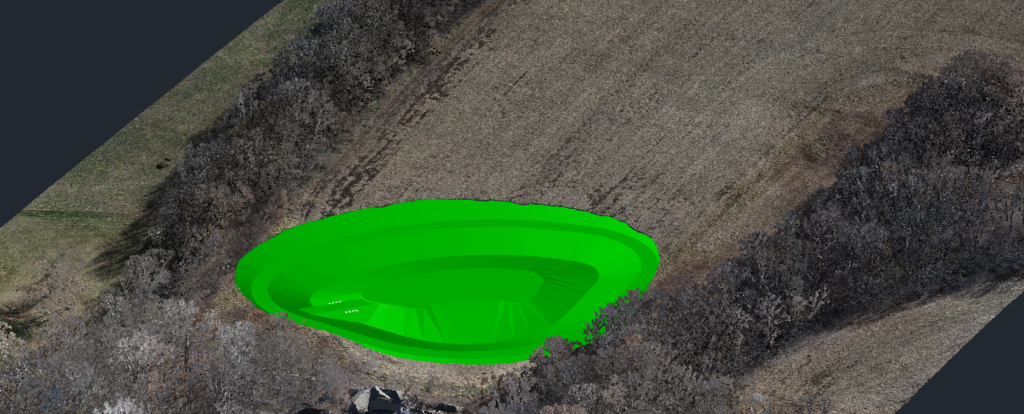
With accurate survey data, lab-tested soils, and the full water picture, we design the pond or lake in AutoCAD Civil 3D. It’s the civil engineering software used for site work and earthwork, and it’s what we use and recommend.
Ponds, lakes, and wetlands should all be designed in true civil earthwork software. Anything less is a sketch, and a sketch is almost always off, often by a long shot.
A Civil 3D pond or lake design includes:
- A 3D surface of the existing ground built from the LiDAR survey
- The finished basin: depths, shelves, side slopes, and shoreline
- The dam: height, top width, side slopes, core trench location, freeboard, and an allowance for settlement
- Principal and auxiliary (emergency) spillways sized to the watershed and design storm
- Normal water level and total storage volume
- Cut and fill quantities, so you know how much dirt is moving and where it’s going
Those quantities matter. They drive the equipment plan, the schedule, and the price. If a contractor can’t show you how the dirt numbers were calculated, you’re paying for a guess.
Wrong Elevations Lead to Bad Bids
When a pond or lake is designed in the wrong software, or built on wrong elevations, the dirt quantities are wrong too. More often than not, that means the job gets badly underbid.
An underbid job doesn’t stay cheap. It usually ends one of these ways:
- Quality gets cut. The contractor tries to finish inside a number that was never realistic, and the corners come out of your pond or lake.
- The contractor runs themselves out of business. That’s a real risk to your project too, especially if they can’t finish.
- You don’t get what you were promised. What gets built isn’t what was agreed to or planned for.
- Change orders start showing up. You’ll often hear “we didn’t expect this,” and the added cost lands on you, the customer.
Many of those surprises are avoidable. Accurate elevations, the right design software, and an honest bid built from real quantities keep them to a minimum, so preventable mistakes don’t become your cost. (Unknown subsurface conditions, like hidden springs or undetected rock or sand, are a separate risk covered above.)
The design also builds in the lifestyle goals above, from fishing structure and hunting flats to swimming areas and waterfront views.
Dam Size, Hazard, and Safety
Not every dam is treated the same. The NRCS Pond standard (Code 378) covers low-hazard dams, generally up to 35 feet of effective height, where a failure would not cause loss of life or damage homes, commercial buildings, main roads, railroads, or public utilities.
Taller dams, or dams with homes, roads, or other structures downstream, carry a higher hazard classification. Those projects call for a licensed engineer and typically state dam safety review. Larger dams across the country are tracked in the U.S. Army Corps of Engineers’ National Inventory of Dams.
For the dams it covers, NRCS guidance includes items such as:
- A cutoff of relatively impervious material under the dam, at or upstream of the centerline
- Minimum top widths that increase with dam height, and side slopes no steeper than the standard allows
- A settlement allowance of at least 5 percent of the dam height
- Freeboard (extra height above the design high-water level) of at least 1 foot, and more on larger drainage areas or taller dams
- Seepage control along spillway pipes, such as a filter diaphragm or anti-seep collars
- An anti-vortex device and trash guard on the principal spillway inlet
- An auxiliary spillway sized for a design storm, often the 25-year, 24-hour storm
These are minimums for a specific class of dam, not a design. A professional design applies them to your site.
Overflow and Water Control Systems Matter
How a pond or lake handles overflow, and how you control its water level, is one of the most important design decisions. There are many systems to choose from, including pipe-and-riser spillways, flashboard risers and other water control structures, drain and drawdown valves, and open-channel emergency spillways. Each one exists for a reason.
Choosing the right system takes an expert. The wrong choice can leave you with a subpar setup that never does what you built the water for:
- Duck lakes and wetlands: the overflow and water control system is critical. Planned right, it lets you draw the water down, plant, and flood it back up when you need it. Planned wrong, it can be the difference between a place to hunt ducks and a plain pond or lake that won’t let you plant or flood it properly. NRCS guidance on seasonal water management for wildlife stresses a reliable water source, the ability to drain on schedule, and careful timing of flooding and drawdown.
- Irrigation ponds and lakes: the system should hold as much water as possible and make it easy to distribute when needed. That’s the difference between an irrigation setup that works sustainably and one that falls short.
- Waterfront homes: poor planning here can make maintenance nearly impossible years down the road, especially if access for equipment to the dam, spillways, and shoreline isn’t considered from the start.
Permits and Regulations
Good design and the right permits go hand in hand.
Depending on the size of the dam, where the water comes from, and what’s downstream, a project may need approval from local, state, or federal agencies:
- Local: county or city requirements for grading and floodplains
- State: dam safety and water rights. In Kansas, that’s typically the Kansas Department of Agriculture’s Division of Water Resources.
- Federal: work in streams or wetlands may require approval from the U.S. Army Corps of Engineers, which can add time and cost
- Stormwater: construction sites that disturb about an acre or more typically need a Stormwater Pollution Prevention Plan (SWPPP) to control runoff and protect water quality
Accurate design drawings make this step smoother, because agencies want to see real numbers.
Under NRCS guidance, the landowner is responsible for getting all necessary permits before construction begins.
How to Build a Large Pond or Lake: The Construction Process
With the design, soil data, and water plan in place, construction typically includes the following work. The order changes from site to site.
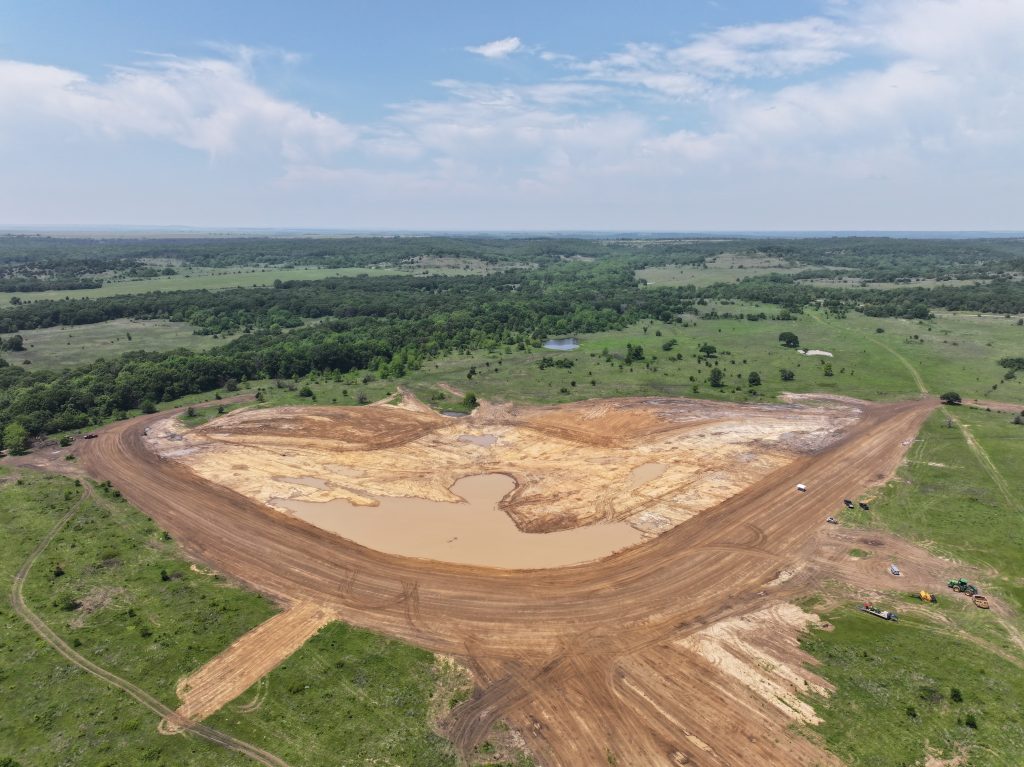
Site Preparation and Water Management
- Clear trees, brush, and debris from the pond and dam footprint
- Strip and stockpile topsoil for later use
- Put the water management plan in place: diversions, dewatering, and erosion control
The Core Trench and Clay Core
The core trench is dug beneath the dam, at or upstream of the centerline, down to suitable material identified by the soil testing. NRCS guidance describes it as a cutoff of relatively impervious material under the dam.
It’s backfilled with clay placed in thin layers, brought to the right moisture, and compacted. This compacted core is the dam’s main barrier against seepage.
Synthetic liners work differently. A geosynthetic liner doesn’t require a clay core trench. The liner covers the entire footprint of the pond or lake and is anchored in with a trench around the perimeter, installed professionally.
Our Vertical Core Liner Method
A traditional clay core only works if the right clay is available. On sites that don’t have enough suitable clay in them, the usual answer is to truck it in from somewhere else, and as covered further down, hauling material is often one of the largest costs on a whole project.
We invented this method in house. Its full name is the Vertical Core Plastic-Liner Repair Installation Method for Waterproofing Dams, though we usually just call it our vertical core liner method. It’s proprietary, we developed and refined it ourselves, and we’ve been installing it on real projects with a good success rate so far.
It uses an engineered synthetic barrier in place of a core built from natural material. That removes the need to source, haul, and place a natural clay core, which makes it especially useful on sites with minimal clay and for owners who either don’t want to bring in outside material or can’t justify what it costs.
It’s also a different thing than lining an entire pond or lake. A full geosynthetic liner covers the whole footprint of the basin. Our vertical core method is focused on the dam, which is where seepage through a poorly built core does the most damage.
It isn’t the right answer for every project. The soils, the dam, the water, and how the pond or lake will be used all factor into whether it makes sense, and that’s a conversation to have with a professional who has actually looked at your site. We also don’t publish the specifics of how we build it.
We use the same method two ways: in new construction where a site doesn’t have workable clay for a core, and as a repair on existing dams that are already leaking. The video below walks through the repair side of it.
Why Compaction Is Critical
Compaction of the dam, and especially the clay core, is one of the most critical parts of building a pond or lake. In our experience, poor compaction is one of the biggest reasons dams leak, settle, or fail.
Loose or poorly compacted fill leaves gaps that water can find. Over time, seepage can wash soil out of the dam from the inside and turn a small leak into a serious problem.
Good compaction comes down to a few things working together:
- Placing fill in thin layers instead of thick ones
- Bringing the soil to the right moisture before compacting it
- Using compaction equipment that fits the soil type and the size of the dam
- Checking compaction as the dam rises, not just at the end
Sheepsfoot compactors are a popular and reasonable choice for clay, but they are not the only way to build a well-compacted dam. The right equipment and method depend on the soils, the moisture, and the design.
Before construction starts, talk with a professional about what compaction equipment will be used and how compaction will be handled and checked. That matters most if you aren’t working with a true pond and lake specialist, or if you’re managing the project yourself.
Excavation and Dam Building
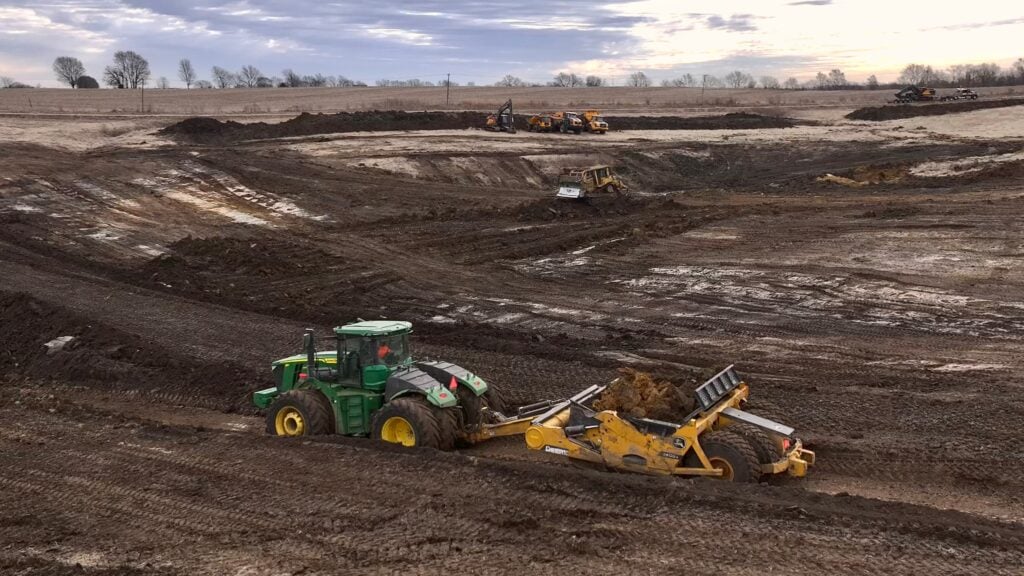
On large ponds and lakes, we use a combination of heavy equipment built for work at this scale, including:
- High-production scraper systems, which cut, haul, and spread material
- Articulated off-road trucks made for large-scale earthmoving
- Excavators
- Heavy-duty modern dozers
Which equipment we use depends on how the bid and design were put together, the layout of the specific property, and the scale of the project. There’s no one-size-fits-all setup, and the most productive combination changes from site to site.
Relying on a dozer-only setup, just because it’s a contractor’s go-to or all they have, is an ineffective approach. We’ve seen it firsthand. It often leads to lower efficiency, and that comes with its own tradeoffs in time, cost, and quality. Learn more about how to dig a pond.
The dam is built up in thin, compacted layers using the soils the design calls for. NRCS pond guidance calls for placing fill in thin lifts (typically 6 to 8 inches) at close to the right moisture content, removing organic and unsuitable soils from the foundation first, and building the dam slightly higher than its final elevation to allow for settlement. Compaction is checked as the dam rises so it doesn’t settle or seep later.
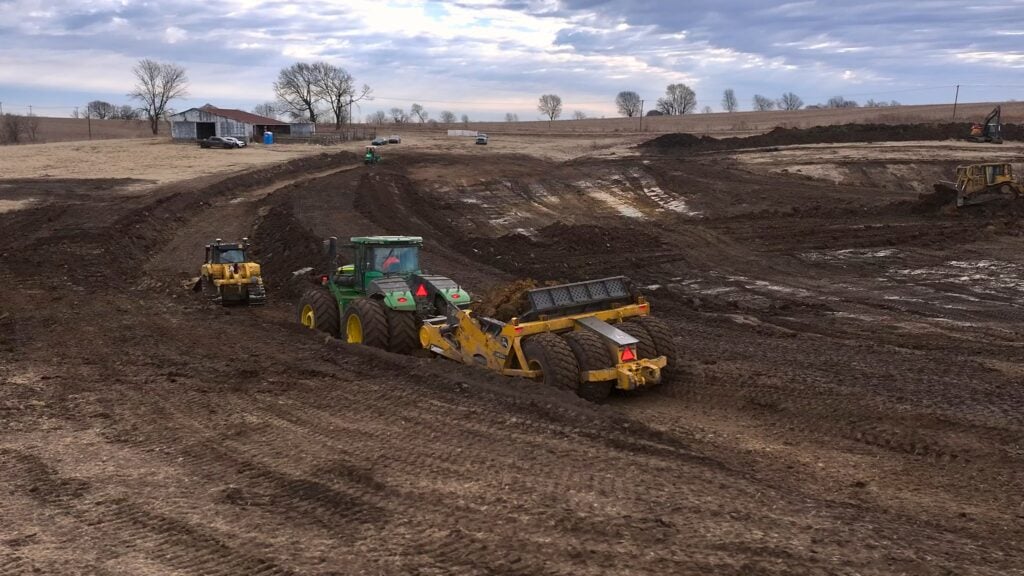
The equipment on site matters more than most people realize. On pond, lake, and wetland projects, the right high-production equipment can mean the difference between a job that generally takes weeks or months and one that drags on for months or even years.
Equipment is only as good as the plan behind it. When a project isn’t surveyed properly with LiDAR and designed right from the start, operators are often left guessing, and that leads to digging too deep or too shallow. The risk of human error goes up even more with inexperienced operators or without GPS guidance. That’s exactly why we use GPS systems on our equipment and continue to invest in more.
Specialized Equipment and GPS Technology
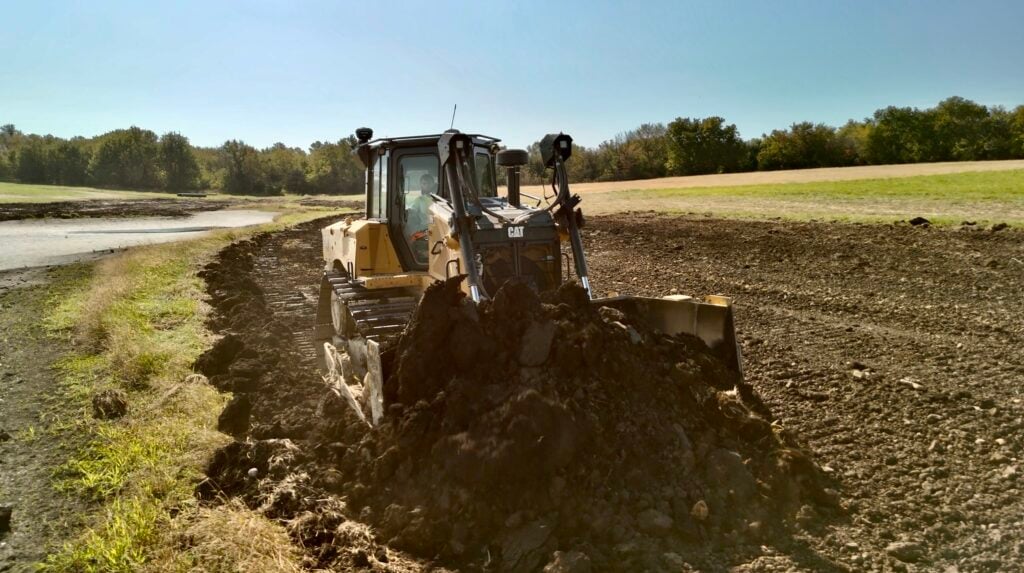
We use specialized earthmoving equipment built for pond, lake, and wetland work, including GPS-equipped machines that work directly from the 3D design. Not all of our equipment has GPS, but we have it in-house and plan to keep investing in this technology.
Even an experienced operator can’t always be relied on just because they’ve “been doing this for years.” GPS takes the bad days and the guesswork out of it. The machine follows the plan to spec, instead of relying solely on human judgment and the errors that come with it.
That puts grades, depths, slopes, and dam elevations where the design says they should be. In our experience, it’s the best type of equipment for construction, and it ultimately saves both the contractor and the owner money.
Equipment age isn’t the whole story. Older and newer machines are both prone to breakdowns. What really matters is how the equipment is treated and maintained. A well-maintained older machine can work hard and hold up, and a neglected new one won’t.
Newer equipment does bring real advantages, usually more comfort for the operator and more modern technology on board, which can help on long days and on precise work. Either way, the machine has to be used properly. The serious earthmoving equipment should be chosen for what moves dirt most productively on that site, and having the right tools for the job takes creative planning, specialized equipment, and knowledge.
Lining and Sealing
If the soil testing shows the basin won’t hold water on its own, the design calls for a seal:
- A compacted clay liner, using suitable clay from the site or brought in
- A geosynthetic liner, such as HDPE or LLDPE, professionally installed with welded seams
- Bentonite, in the right soils and at the right application rate
Geosynthetic Liners: HDPE, LLDPE, and Other Heavy-Duty Options
Geosynthetic liners (also called geomembranes) are engineered plastic sheets made to seal ponds and lakes. Common options include:
- HDPE (high-density polyethylene)
- LLDPE (linear low-density polyethylene)
- Other extremely heavy-duty engineered plastic liners, chosen to fit the site and the project
These materials are waterproof by design. Installed by a professional, a geosynthetic liner creates an extremely watertight barrier without relying on suitable clay being available on the site.
That makes liners a popular choice in sandy soils and on sites where good clay is scarce or too expensive to bring in.
Soil testing is still recommended on liner projects. It shows what has to be excavated, whether rock will need to be broken or removed, and what material is needed to prepare a smooth, stable base under the liner. Planning for that up front, along with the survey, water, and design work, keeps the project on budget.
A liner is also a form of risk management. For owners who don’t want to invest heavily in chasing down every unknown, the liner itself does much of that work. It’s an engineered, waterproof material, so the finished pond or lake depends far less on what the natural soils turn out to be.
Springs and unwanted materials can still show up during excavation if sampling and investigation didn’t reveal them. In most cases, though, that’s far less of a catastrophe on a lined project than on one relying on natural material to hold water. It often takes a lot of the wondering out of the process.
Liners aren’t risk-free, though. The excavation and the water management plan still have to be handled the same way they would be on a natural-clay build.
Liner Installation: What Often Goes Wrong
Synthetic pond and lake liners need a professional to install them and seam them in the field. Almost every liner needs seaming on site, even when the panels are made to spec by the manufacturer or the installing company. That’s the nature of the installation, and it’s how a proper, watertight install is achieved.
Some of the most commonly missed items on liner projects include:
- The wrong seaming method. A seam that isn’t done properly may not seal, and it can leak.
- The wrong liner material for the site or the intended use.
- No plan for water management under and around the liner.
- No plan for gas buildup. Gas can collect under a liner and needs to be anticipated in the design.
Small defects can happen during installation and are usually minor and repairable. But when seaming is done wrong, the consequences can be serious. It can badly hurt the company that installed it, and for an owner who attempts the installation themselves, fixing the mistakes can drive costs to two or three times the original.
That’s why we use specialized seaming equipment and have liner specialists on site to make sure every seam is properly sealed.
Liner Thickness and Underlayment
Material choice and site prep matter just as much. On rocky or gravelly soils, a liner that isn’t thick enough, or a missing underlayment (a protective layer beneath the liner), often leads to punctures and faster deterioration.
A common misconception is that underlayment is always required. It isn’t needed in every application. We generally recommend it because it’s a good layer of protection to have, but whether it’s necessary depends mostly on the soils and how the pond or lake will be used.
If there will be activity or traffic in the pond or lake, we always recommend a much thicker, higher-quality liner.
Spillways, Pipes, and Final Grading
The principal spillway pipe and riser are installed through the dam. The emergency spillway is cut to its design elevation. The basin, shelves, and slopes are graded to match the design.
Trash guards go on the overflow, not on the pipe itself, and they aren’t a standard part of every build. Whether one belongs there depends on the type of pond or lake, how the overflow is designed, and what is likely to float toward it. We do install them and generally recommend them, since an overflow that plugs up is one of the easier ways to end up with water going somewhere it was never designed to go.
Seepage control along the pipe, such as a filter diaphragm or anti-seep collars, isn’t always necessary. We recommend it anytime a pipe will be exposed to constant water, since that’s where seepage along the pipe becomes a real concern.
Where there isn’t constant water on the pipe, it’s often not a necessary investment. It’s very case by case, and it should be evaluated carefully by a professional who has looked at the design, the soils, and how the water will sit.
Topsoil, Seeding, and Erosion Control
Stockpiled topsoil is spread back over the dam and disturbed areas. NRCS guidance calls for establishing permanent grass cover on the dam and spillways as soon as possible after construction, and keeping trees off the dam. Everything is protected with erosion control until the grass takes hold. Rock (rip-rap) can be added where waves or flowing water will hit the banks.
Seeding and Finish Work
Seeding and the finish touches are what people notice most, and they matter well beyond looks. They affect erosion, maintenance, and how the pond or lake holds up long term.
Skipping seeding and erosion control, or waiting too long to do it, causes real problems. Bare ground erodes fast. Even when the work is done right, expect some erosion marks early on while the grass takes root. That part is normal.
Without erosion control in a reasonable timeframe, though, those small marks turn into washouts and deep ruts. That sediment ends up in your new pond or lake, and the ruts make the ground around it difficult to mow and manage for years.
There are several options, and each has tradeoffs:
- Sod: the most finished look right away, but it generally needs an irrigation system to protect the investment and keep it alive.
- Hydroseeding: good coverage, but it depends on timing and moisture.
- Drill seeding: places seed in the soil for good contact.
- Broadcast seeding with straw or erosion control matting (ECM): the most affordable approach, but seasonal timing matters even more.
The less expensive options usually need to be timed right seasonally. The higher-end options like sod usually need irrigation to last.
We no longer recommend that clients handle the seeding themselves. We strongly recommend having the contractor, or their landscaping and seeding partners, take care of it, because redoing failed seeding can cost a tremendous amount.
Weather is the biggest risk here. With seeding and hydroseeding especially, a large storm or a drought without irrigation can wipe out the work and force another application. That’s outside anyone’s control, and it’s worth weighing when you choose an option. All of these options can work well, but each one comes with risk that has to be understood and managed over time.
Shoreline Erosion Control
Erosion control along the water’s edge is worth considering on any pond or lake. The common options are rock and stone, seawalls, or natural borders intentionally planted for erosion control and filtering.
All of them help hold the banks in place, and they can tremendously extend the life of a body of water. They also cut down on long-term maintenance, which is where most owners feel the difference.
On lined ponds and lakes, we especially recommend it. Covering the liner along the shoreline with rock, stone, or intentional vegetation protects it from UV exposure, which extends the life of the liner. It also makes a major difference in how the finished pond or lake looks.
Check the Work, Then Verify It With LiDAR
Checking the jobsite during construction is important. Grades, depths, slopes, and dam elevations should be checked against the design as the work progresses, not just assumed.
That matters even more if you aren’t working with a pond and lake specialist, or if the contractor isn’t using GPS-guided equipment. Without GPS, the work relies more on the operator’s judgment, and small errors can add up across a large pond or lake.
The most important check comes at the end. A final LiDAR survey of the finished work, compared against the design, is the best way to be sure you got what you paid for: the right depths, the right dam height, the right spillway elevations, and the right volume of water.
Filling and Monitoring
A large pond or lake typically fills from rainfall and runoff from its watershed, sometimes helped by springs or wells.
As it fills, keep an eye on the water level, the dam, and the spillways. Early monitoring catches small problems before they become big ones.
Test the water quality before stocking fish.
Consider Pond Dye While It Fills
A new pond or lake is especially prone to algae and unwanted aquatic growth while it fills. The water is shallow and clear, and sunlight reaches the bottom easily.
Pond dye is worth considering during that stage. It limits how much sunlight reaches the bottom, which helps hold down algae and unwanted vegetation as the water comes up.
Aggressive species like cattails, lotus, and other invasive aquatic plants are much easier to stay ahead of early. Left alone in those first seasons, they can become a real headache to manage later.
We also highly recommend having a long-term management plan in mind, and considering that management during the design stage rather than after the fact. For that, we highly recommend consulting with specialists in ecology and fisheries, including our partners.
Plan Uses, Habitat, and Features in Advance
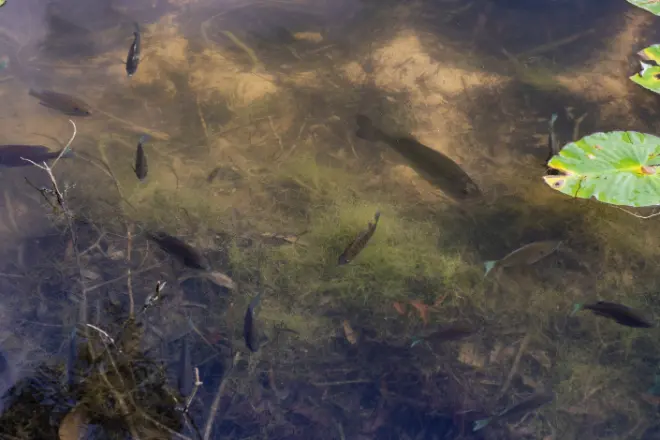
Planning how you’ll use the water, and what you want in it, is just as important as the dirt work. It should happen during design, not after the fact.
Depths, shoreline shape, and how natural material like rock, soil, and trees get repurposed or placed all affect the entire project. Planned up front, these features are usually far more feasible, more affordable, and better long term. Added later, they often mean reworking something that’s already built.
Items worth planning for during design include:
- Fish stocking and fish habitat
- Flooded timber and other natural structure left standing for fisheries
- Peninsulas and islands
- Which trees to preserve and which to remove
- Docks, beaches, and water access
- Shallow areas and water level control for wildlife
- Lighting, entertainment, and gathering areas
Even if you won’t add everything right away, plan for it during design so the pond or lake is built around it. Discover more custom pond features for your acreage pond here.
Flooded timber is one worth deciding on early. Leaving standing timber in part of the basin creates excellent fish habitat, but it has to be planned during design. Which trees stay, where they sit, and how deep they end up all affect the fishery, the look of the water, and how you’ll use the surface.
High-Maintenance vs. Low-Maintenance Design
It’s also worth deciding early how much maintenance you want to sign up for. Some features and inclusions take far more upkeep than others, and upkeep is cost.
A low-maintenance pond or lake is designed to mostly take care of itself. A higher-maintenance one, with more plantings, structures, and finished areas, can be beautiful and exactly what you want, as long as you go in knowing what it takes to keep it that way. Deciding which one you want during design keeps the long-term costs from surprising you later.
The Right Partners Make the Vision Work
A true specialist doesn’t work alone. They work alongside ecologists, licensed engineers, and other partners, including fisheries experts and fish stockers, biologists, dock builders, landscapers, and lighting and entertainment specialists.
That network is what makes sure your vision is accounted for before construction starts, not after. We work with many specialists and also handle a great deal in-house.
Aeration Is Worth Planning For
We recommend aeration on every pond and lake. It’s an investment to weigh, but it helps in nearly every part of how a pond or lake performs.
It matters most on water with fish that has no natural movement or spring flow to keep it turning over. Some owners still choose to go without it, and that’s their call.
After seeing the difference firsthand between the ponds and lakes that have aeration and the ones that don’t, we now recommend it across the board. In our experience it means fewer fish kills, along with clearer, more enjoyable water. It’s also much easier and cheaper to plan for during design than to add later.
Maintenance
A well-built pond or lake still needs care. NRCS guidance calls for an operation and maintenance plan that includes:
- Watch water levels and look for seepage, erosion, or wet spots on the dam
- Keep trees and brush off the dam, since roots can create leak paths
- Manage algae and aquatic weeds early
- Plan for muck removal when sediment builds up
- Keep spillway inlets and trash racks clear of debris
- Inspect the dam, spillways, and pipes on a regular schedule, and repair damage promptly
Costs and Considerations
Costs on a pond or lake project don’t spread out evenly. A few line items carry most of the budget, and on most projects they fall in roughly the same order.
- Earthwork. This is the largest cost on a project, and it’s driven by two things: how much dirt has to move, and how far it has to move.
- Hauling materials. When material has to be brought in from off site, hauling is usually the next largest cost after the dirt work.
- Mobilization. Getting equipment to the jobsite and back is a real line item, and it’s one a lot of people don’t think about until they see it.
- Overflow systems. Pipes, risers, structures, and the work to install them correctly.
- Seeding and finish work. Where this lands depends on which method is chosen, since there’s a wide range between basic seeding and the more involved options.
- Everything else generally follows after those.
Earthwork cost comes down to volume and distance. Moving a large amount of dirt a short distance can cost less than moving a smaller amount a long way across a site, which is why two ponds of the same size on two different properties can price out very differently.
Hauling gets expensive fast because you’re paying for trucks, time, and fuel on top of the material itself. If a site doesn’t have usable clay or suitable fill on it, that material has to come from somewhere, and every load has a cost attached to it. That’s exactly the problem our in-house vertical core liner method was built to solve on sites where hauling in clay isn’t practical or affordable.
Design and permitting are the two that move the most. On a project with heavy requirements or serious permitting, they can climb to the top of the list. On a straightforward project, they can sit at the very bottom. It depends entirely on the site, the water, and what the project has to satisfy.
On most projects, though, design and permitting are not at the top of the list compared to everything above. They also happen to be the part that protects everything else. Getting the survey, the soils, and the design right up front is what keeps earthwork quantities and hauling needs from turning into surprises in the middle of construction. Follow the link to see how much it costs to build a pond based on size and other factors.
Want Real Numbers for Your Property?
Every site prices differently, and the only way to know what yours will cost is to look at it. Contact us to talk through your property, how you want to use the water, and what it realistically takes to build it right.
The Right Team Matters
A true pond and lake specialist has in-house expertise or trusted contacts for the parts of a project that go beyond dirt work, including licensed engineers, fisheries specialists, and ecologists.
Those experts help make sure the project meets the proper regulations, and that stocking and long-term management plans are set up for lasting success.
If you ask for that kind of expertise and a contractor tells you “you don’t need that,” take it as a warning sign. That contractor is likely not a good fit, and can be a major risk to your project.
Questions to Ask Before You Hire Anyone
- How was the site surveyed? Was it LiDAR or photos?
- What software was the pond designed in? Can I see the cut and fill quantities?
- Were soil samples taken at depth and tested by a lab?
- How were the watershed and spillways sized?
- What equipment will you use to compact the dam and core, and how will compaction be checked?
- Will the finished work be checked with a final LiDAR survey against the design?
- Who will you bring in for engineering, fisheries, or ecology needs?
- Are there springs or groundwater on the site? What’s the plan and budget for them, and what happens if one is found during construction?
- How will you handle unknown subsurface conditions, like rock or unsuitable soil, if they turn up?
If the answers are vague, the design probably is too. Read more about the importance of professional pond excavation.
There’s More to It Than One Article
These are some of the biggest topics, but they’re far from all of them. There’s a lot more we could cover, and a lot of complexity and nuance that comes with pond, lake, and wetland projects.
This work is quite literally science: soils, water, earthwork, and biology all working together. That’s why every project is unique, and why the right approach for your property may look different from anything described here.
Helpful Resources
- NRCS Agriculture Handbook 590: Ponds, Planning, Design, Construction
- NRCS Conservation Practice Standard: Pond (Code 378)
- NRCS Web Soil Survey
- NRCS Annual Soils Refresh
- NRCS Conservation Compliance for Wetlands
- EPA: Exemptions to Permit Requirements Under Clean Water Act Section 404
- U.S. Army Corps of Engineers, Kansas City District Regulatory Program
- U.S. Army Corps of Engineers National Inventory of Dams
Build It Right With Bulletproof Pond and Lake
All we do is ponds, lakes, and wetlands.
Every project starts with a LiDAR survey, lab-tested soils, historical and watershed research, and a full design in AutoCAD Civil 3D.
That’s how we build ponds and lakes that hold water, hold up, and stay in the family for generations.
Whether you’re after trophy bass, a private duck hunting spot, a place for the kids to kayak, or a waterfront view to pass down, we’ll help you build it right.
Ready to get started? Fill out our contact form today, or give us a call.
The information in this article is general and educational. Every site is different, and results depend on site conditions, design, construction, and maintenance. Bulletproof Pond and Lake makes no guarantee that this information applies to or will produce a specific result on any particular property.